
Taking care of your feet is an important part of personal grooming and overall hygiene. Feet are constantly exposed to dust, pressure, sweat, and friction, which can lead to dryness, cracked heels, rough skin, and unhealthy nails. A pedicure is not just a beauty treatment—it is an essential self-care routine that keeps feet clean, nourished, and relaxed.
While salon pedicures are popular, learning how to do a pedicure at home allows you to maintain foot health regularly without spending money or time at a parlour. With the right steps and tools, Pedicure at Home can deliver results that are just as effective as professional treatments.
What Is a Pedicure?
A pedicure is a complete foot-care process that involves soaking, cleansing, exfoliating, nail trimming, cuticle care, moisturizing, massage, and optional nail polishing. It improves foot hygiene, enhances appearance, and prevents common foot problems such as fungal infections, ingrown nails, and cracked heels.
Benefits of Doing a Pedicure at Home
Regular Pedicure at Home offer multiple physical and aesthetic benefits:
- Keeps feet clean and odor-free
- Removes dead skin and rough patches
- Prevents cracked heels and dryness
- Improves blood circulation
- Relieves foot stress and fatigue
- Maintains healthy nails and cuticles
- Saves money compared to salon visits
- Allows better hygiene control
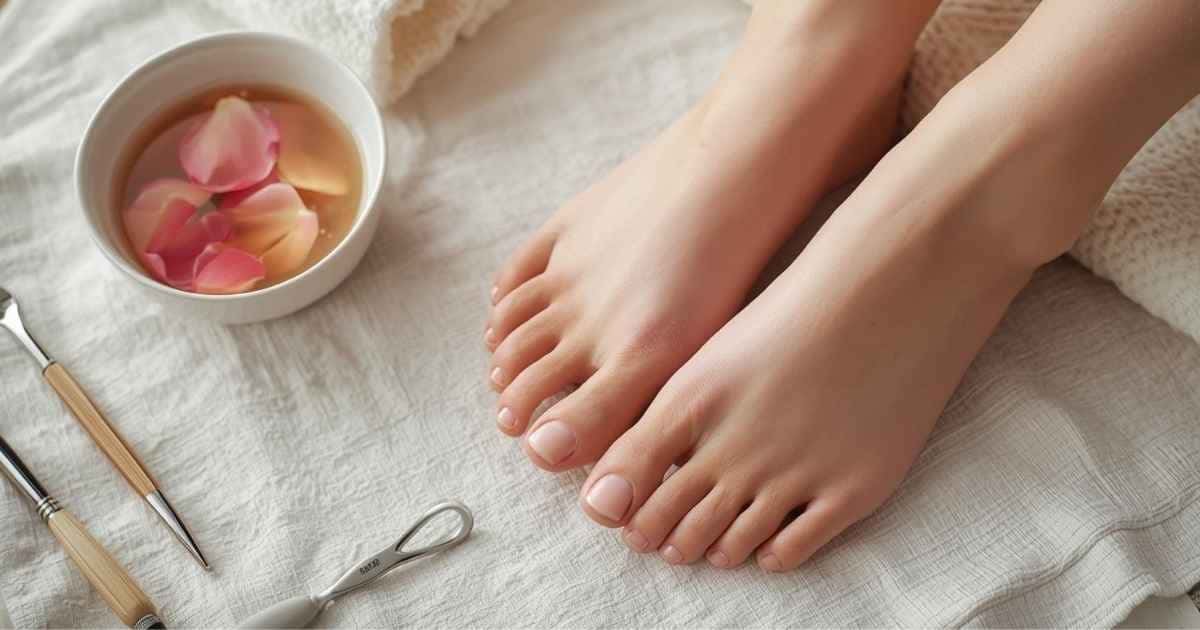
Things You Need for a Home Pedicure
Before starting, gather the following essentials:
- Basin or foot spa tub
- warm water
- Foot soak, salt, or mild cleanser
- Nail polish remover
- Nail cutter and nail file
- Cuticle pusher
- Pumice stone or foot file
- Foot scrub or exfoliator
- Clean towel
- Foot cream or moisturizer
- Nail polish, base coat, and top coat (optional)
Make sure all tools are clean to avoid infections.
Step-by-Step Guide: How to Do a Pedicure at Home
Step 1: Remove Old Nail Polish
Start by removing any existing nail polish using a gentle nail polish remover. Clean nails help you clearly assess nail health and shape.
Step 2: Soak Your Feet
Fill a basin with warm water and add foot soak, salt, or a few drops of essential oil. Soak your feet for 10–15 minutes.
Why this step matters:
Soaking softens hard skin, relaxes muscles, and prepares feet for exfoliation.
Exfoliating your feet is essential to remove dead skin, rough patches, and calluses. Start by gently rubbing a pumice stone or foot file over your heels, soles, and the sides of your feet, focusing on rough areas. Use circular motions to lift dead skin without causing irritation.
Step 3: Exfoliate and Remove Dead Skin
Next, apply a foot scrub to enhance exfoliation. If you don’t have a ready-made scrub, you can make a simple DIY version at home. Mix 2 tablespoons of sugar with 1 tablespoon of olive oil and massage it gently over your feet in circular motions for a few minutes. This helps remove dead skin while moisturizing your skin naturally.
Finally, rinse your feet with warm water and pat them dry.
Step 4: Trim and Shape Your Toenails
Proper toenail care is an essential part of a pedicure. Start by trimming your nails straight across rather than in a curved shape. This helps prevent ingrown toenails, which can be painful and lead to infections. After cutting, use a nail file to smooth the edges, filing in one direction to avoid splitting or weakening the nails.
While shaping your nails, pay attention to their length and symmetry. Nails that are too long can break easily, while nails that are too short may expose sensitive skin and increase the risk of injury.
Tip: Avoid cutting nails too short or digging into the corners. Instead, maintain a natural length that extends just slightly beyond the tip of your toes. Smooth edges with a gentle file to prevent snagging and discomfort.
Taking the time to trim and shape your toenails correctly not only improves their appearance but also ensures that your feet stay healthy, neat, and comfortable, especially when wearing shoes.
Step 5: Cuticle Care
Taking proper care of your cuticles is essential for maintaining healthy nails and preventing infections. Start by applying a small amount of nourishing cuticle oil, or you can also use coconut oil. Massage it gently into the base of each nail, ensuring the skin around the nail receives moisture. This helps soften the cuticles, making them more pliable and less prone to tearing or damage. After moisturizing, use a soft cuticle pusher to push the cuticles back gently. Be cautious not to apply too much pressure, as excessive force can damage the nail bed and lead to pain or infection. Avoid cutting the cuticles deeply or trimming them aggressively, since cuticles act as a natural barrier, protecting your nails from bacteria, fungi, and other potential infections.
Also Read This: Little Minaxo: Types of Fabrics: Everything You Need to Know
Step 6: Moisturize and Massage Your Feet
Moisturizing and massaging your feet is a crucial step in keeping them soft, healthy, and free from dryness or cracks. Begin by choosing a rich, nourishing foot cream or a natural alternative such as shea butter or coconut oil. Apply a generous amount to your feet, making sure to cover every area, including the tops, soles, heels, and even between the toes.
Once the cream is applied, spend 5–10 minutes massaging your feet. Focus on areas that typically experience the most stress, such as the heels, arches, and ankles. Use gentle circular motions to work the cream into the skin, which not only helps with hydration but also improves blood circulation, reduces tension, and relieves fatigue. Don’t forget to massage each toe individually and the spaces in between, as these areas often get neglected but can become dry or stiff.
Massage benefits:
- Boosts blood circulation
- Reduces swelling and pain
- Improves skin softness
- Relieves stress
Step 7: Apply Nail Polish (Optional)
- Nail Polish: If you want to add color and shine to your nails, applying nail polish can be a fun and finishing touch.
- Henna: Henna isn’t just for skin—it can also be used to stain your nails a soft reddish-brown shade. It’s a natural option that adds a touch of color and can strengthen nails over time.
- Fruit or Vegetable Stains: For a fun and natural DIY option, you can use beet juice, carrot juice, or hibiscus petals to give nails a temporary tint. Simply rub or soak nails in the juice and allow them to dry. It gives a soft, natural color and is completely chemical-free.
Natural Pedicure Remedies at Home
Treatment for Cracked Heels
Cracked heels can be uncomfortable, painful, and unsightly, but with consistent care, they can be healed and prevented. Start by applying a thick layer of petroleum jelly or natural oils like coconut oil, shea butter, or olive oil directly onto the cracked areas. These moisturizers help soften hard, dry skin and create a protective barrier that locks in hydration.
For best results, wear a pair of clean cotton socks overnight after applying the oil or petroleum jelly. This allows the product to deeply penetrate the skin while keeping the feet warm, which improves absorption and speeds up healing.
Foot Whitening Remedy
Lemon Juice and Rose Water
Lemon juice has natural bleaching properties and is rich in vitamin C, which helps lighten dark patches. Rose water soothes and hydrates the skin.
- Mix 1–2 tablespoons of fresh lemon juice with an equal amount of rose water.
- Apply the mixture evenly on your feet using a cotton ball or your fingertips.
- Leave it on for 10 minutes and then rinse with lukewarm water.
- Repeat 2–3 times a week, followed by a moisturizer to prevent dryness.
How Often Should You Do a Pedicure at Home?
- Normal foot care: Once every 2 weeks
- Dry or cracked feet: Once a week
- Nail maintenance: Weekly trimming and filing
Consistency is key to healthy feet.
Common Pedicure at Home Mistakes to Avoid
- Cutting nails too short
- Over-scrubbing skin
- Cutting cuticles deeply
- Skipping moisturizer
- Using unclean tools
Aftercare Tips for Long-Lasting Results
- Apply foot cream daily before bed
- Wear breathable footwear
- Avoid walking barefoot on rough surfaces
- Keep feet clean and dry
- Use sunscreen on feet when outdoors
Pedicure at Home vs Salon Pedicure
| Pedicure at Home | Salon Pedicure |
| Cost-effective | Expensive |
| Full hygiene control | Depends on salon hygiene |
| Flexible timing | Fixed appointments |
| Personalized routine | Standard procedures |
FAQs
Q1: Is Pedicure at Home safe?
Yes, Pedicure at Home can be completely safe as long as you follow proper hygiene and techniques. Always use clean and sanitized tools, soak your feet in warm water to soften the skin, and avoid cutting cuticles too deeply. Gentle filing and scrubbing help prevent injuries, infections, or irritation.
Q2: Can I do a Pedicure at Home without a foot scrub?
Absolutely. While a foot scrub helps remove dead skin more effectively, you can also use natural ingredients like sugar, salt, oatmeal, or coffee grounds mixed with oils (such as coconut or olive oil) to exfoliate. These natural scrubs are gentle, effective, and safe for sensitive skin.
Q3: Does Pedicure at Home remove tan from feet?
Regular exfoliation during pedicures can gradually lighten tanned skin on your feet. Combining gentle scrubbing with moisturizing and applying natural brightening ingredients like lemon juice, yogurt, or aloe vera can improve skin tone over time. However, results are gradual and require consistent care.
Q4: Can men do a pedicure at home?
Absolutely. Pedicures are not limited by gender. Healthy, clean, and well-maintained feet are important for everyone. Men can benefit from foot soaks, exfoliation, cuticle care, and moisturizing to prevent dryness, calluses, and nail problems.
Q5: How often should I do a pedicure at home?
For best results, a home pedicure can be done once a week or every two weeks, depending on your skin type and foot condition. Regular care prevents buildup of dead skin, reduces calluses, and keeps nails healthy. Daily moisturizing of your feet is also highly recommended.
Q6: Can pedicure help with cracked heels?
Yes, regular exfoliation, moisturizing, and massage during a pedicure can soften hardened skin and help heal minor cracks. Using thick creams or natural oils like shea butter or coconut oil after exfoliation helps repair and protect the heels.
Q7: Are Pedicure at Home painful?
Pedicure at Home should never be painful. If you feel pain while scrubbing, filing, or pushing back cuticles, stop immediately. Pain can indicate too much pressure, sensitivity, or a nail/skin problem. Gentle techniques and proper tools are key to a safe, comfortable experience.
Q8: Can Pedicure at Home prevent foot odor?
Yes. Cleaning, exfoliating, and moisturizing your feet, along with trimming nails and removing dead skin, can significantly reduce foot odor. Using antiseptic or antifungal foot soaks occasionally also helps maintain hygiene and freshness.
Q9: Can I use home pedicure tools on other family members?
It’s best to avoid sharing tools, even among family, to prevent the spread of infections or fungi. Always use sanitized tools or dedicate a separate set for each person.
Q10: Can a pedicure improve nail growth?
Yes. Proper nail care during a pedicure, including gentle filing, cuticle care, and massage, improves blood circulation to the nail bed. This can encourage stronger, healthier, and slightly faster nail growth over time.
Final Words
Learning how to do a pedicure at home is a valuable self-care skill that keeps your feet healthy, soft, and beautiful. With regular care, simple tools, and natural remedies, you can achieve salon-like results without leaving your home.
A home pedicure is not just about appearance; it is about comfort, hygiene, and long-term foot wellness.


3 thoughts on “How to Do a Pedicure at Home: A Complete Foot Care Guide for Soft, Healthy, and Beautiful Feet”